Friday, March 20, 2015

Designer for Less: Travel Wallet


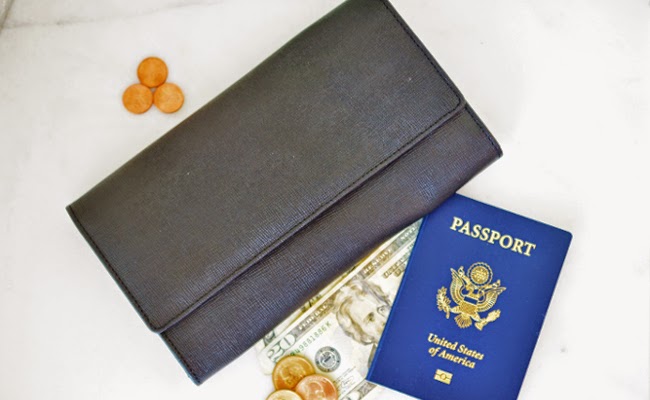
I love Aspinal of London’s accessories, and ever since I discovered their travel collection I’ve been smitten. The gorgeous Italian calf leather luggage tags, passport cover, and tabbed travel wallet come in a variety of colors, and I’m more than a bit obsessed with the aqua collection. The only problem is that the set costs a whopping $325. Sadly, it’s not an expense I can justify when I travel abroad once a year, and that's a substantial chunk of my spending money for a month. Even if I just bought the travel wallet, which speaks to my hyper-organizational tendencies, it'd set me back $250. Yikes. Still, I was desperate for my own travel wallet and decided to see if there were any brands that made something similar with a more reasonable price tag.

I scoured the internet for ages before discovering that ASOS has travel wallets for $30-45, which is more my price range. The ASOS wallets are leather and have three tabs (passport, tickets, and other), which will help me to keep things organized,  and that makes all the difference in a travel experience, don’t you think? There’s nothing worse than having to rummage through your bag or carry-on to find your passport or boarding pass. The wallet is bigger than your average wallet, but considering what it’s meant to hold, that makes sense. The only thing “negative” point would be that the leather isn’t exactly supple, but I do like the textured leather. My wallet doesn’t seem to be available anymore, but ASOS has other similar styles right now.


I haven’t used mine yet, but it’s definitely going with me to France. Last year I was one of those poor individuals rooting through her handbag for her passport after it slipped into a side pocket, unbeknownst to her.  Can you imagine not having your passport when you get to the airport? I had a panic attack, and the experience probably shaved a couple years off my life. I’ll be eternally grateful to ASOS if my chic travel wallet prevents a repeat of last year.  Now to find myself a cute passport cover!

What are some of your favorite designer dupes?

Wednesday, March 18, 2015

5 Smart Ways to Pay Off Student Loans


I loved my time at Cornell but it’s time to pay up in blood, sweat, tears, and a lot of cash. If you’re in the US, you’ve probably heard politicians talking about the scourge that is student loans. President Obama only paid off his shortly before taking office in 2008, and he’s issued executive orders to help students and graduates shoulder the burden. So many of my friends related to Quinn Perkins when Shondaland’s Scandal poked fun at the loan collection services (“Who has money? All I have is student loans. It doesn’t matter how many times you reinvent your identity, Sallie Mae will find you”). We all laughed somewhat uncomfortably because, really, ain’t that the truth? 

I graduated with about $100k in loans, which means that most of my salary each month goes toward paying them off. I’ve been making these dreaded payments for a couple of years now, and although I’m no expert, I thought I’d share some tips for paying off that mountain of student loans. Without further ado…

You can start paying off interest will you’re still in school.  This is something I wish I had known at the time. I’d still double-check with your loan company to make sure that making a payment won’t mean you forfeit your grace period, but if not, and you can afford to, put some money toward the interest on your loans each month. A large chunk of what you end up paying monthly is interest (not the money you borrowed, “the principle”), so doing this will give you a bit of a jumpstart. Trust me, any little bit helps.

Keep organized. You don’t want to be charged late fees on top of everything else, so it’s important to know when your payments are due and how much you’re expected to pay. Simple enough, right? Well, if you’re like me, you will probably have a loan for each year you were in school at the very least (I happen to have seven individual loans). To keep track of everything, I created an Excel spreadsheet with info on each loan (due date, payment amount, and interest rate). Whenever I pay a loan, I make sure to jot it down so I know what’s been paid and what hasn’t. I also have Google Alerts set up in my iPhone.

Make a budget. I use one simple equation for this: Monthly Salary – Cumulative Loan Payments = Spending Money. It’s easy to overspend, especially if you buy small things here and there. It turns out that even a $5 purchase here and a $10 purchase there add up. It’s important to know how much you can afford to spend each month so that you have enough money to pay up when the time comes.

Don’t pay your loans with credit cards. This is basically like paying off one loan with another, and you’ll quickly find yourself in a sticky situation.

Pick the payment plan that works for you. Whether you have ten year or twenty-five year loans, a graduated payment plan or an income-based one, make sure it works for your budget. You can also contact the loan services to change the due date if necessary. Just remember that although an extended term means smaller payments now you’ll end up paying more in the long run.

Loans are evil, let’s just put that out there. There are so many other things I’d like to do with that hard-earned money of mine (shop, travel, move out of my parents’ house) but, sadly, I have to be a grown-up and be responsible and all that stuff. 

Adulthood can be lame sometimes.

Monday, March 16, 2015

Boozy St. Patrick's Day Cupcakes

I might not be Irish, but on St. Patrick’s Day, everyone gets to be Irish for a few short hours.  It’s the one day a year when bagpipe music isn’t considered a nuisance and people aren’t repulsed by the idea of drinking green beer.  You can be sure that I’ll be going to our local Irish pub to take part in the revelry!

So, in honor of St. Patrick’s Day, I decided to do a bit of boozy baking.  I discovered two recipes for Guiness Cupcakes with Bailey’s Irish Cream Frosting last summer and have been impatiently waiting for March 17th.  I ended up creating a hybrid of the two recipes because I liked the simplicity of the cupcakes and frosting in one but couldn't resist the ganache from the other.

Slightly modified recipe from Family Fresh Meals & ganache recipe from The Stir.

Chocolate Guiness Cupcakes

You’ll Need…


2 cups all-purpose flour
½ cup cocoa powder
¼ tsp salt
1 ½ tsp baking soda
1 cup granulated sugar
½ dark brown sugar
½ cup unsalted softened butter
2 tsp vanilla extract
2 eggs
½ cup sour cream
1 (12 oz.) bottle of Guiness Extra Stout Beer

And the Steps…


Preheat the oven to 350°F and prepare 2 (12 count) muffin tins with paper liners.  In a large bowl mix together flour, cocoa powder, baking soda, salt, butter, granulated sugar, and dark brown sugar until the ingredients are fully incorporated.  Add 2 eggs, vanilla extract, and sour cream and mix.  Slowly add Guiness Extra Stout and mix until ingredients are fully incorporated and the batter is smooth.  Fill each muffin cup to about halfway and bake for 20-25 minutes.  A toothpick inserted into the center of a cupcake should come out clean. Set aside to cool before frosting.

I ended up having a bit of extra batter using this recipe, so I made a small Chocolate Guiness Cake. 

Jameson Ganache


You’ll Need…


4 oz bittersweet chocolate, finely chopped
4 oz (1/2 cup) heavy cream
1 tbsp unsalted butter, at room temperature
3 tbsp Jameson Irish Whiskey

And the Steps…


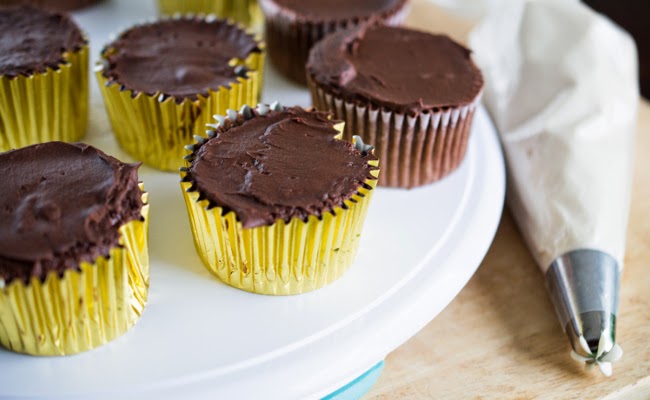
Bring heavy cream to a boil.  Pour over a bowl of the finely chopped chocolate and butter, and let mixture sit for several minutes. Stir until mixture is glossy. Add whiskey slowly, stirring to incorporate.  Refrigerate for 5 minutes and stir.  Repeat this step 2-3 times until the ganache is thick and cooled. With a spatula, cover the top of each cooled cupcake with ganache. 

This step needs to be well-timed, which I learned the hard way.  You can’t leave the ganache for too long or it becomes too firm to spread.  I ended up putting the ganache over the stove to melt it slightly, and then mixing it again until it was a spreadable consistency. This step should be done once the cupcakes are cooled so that you can cover them as soon as the ganache is ready.

Bailey’s Cream Cheese Frosting

You’ll Need…


2 (8 oz) blocks of cream cheese, at room temperature
2 (4 oz) sticks of unsalted butter, at room temperature
5 cups confectioner’s sugar
8 tbsp of Bailey’s Irish Cream

And the Steps…


Mix cream cheese and butter until they are both fully incorporated.  Gradually mix in confectioner’s sugar (also known as powdered sugar) and beat until light and fluffy.  Slowly add the Bailey’s Irish Cream and beat until all ingredients are incorporated.  Put frosting in the refrigerator to set for 20-30 minutes.  Frost cupcakes using an icing bag.

I ended up doubling Family Fresh Meals’ frosting recipe.  I rather have more frosting than less since there’s nothing worse than running out or having to be stingy. Whatever frosting I have leftover, I just freeze.  I also added an extra cup of confectioner’s sugar because the frosting was too runny after I added the Bailey’s.  With the extra confectioner’s sugar and time in the refrigerator, the frosting was the perfect consistency for piping.

----------

These are some boozy cupcakes, just as a warning, but they taste amazing!  The cupcakes were nice and moist with a subtle taste of stout. No wonder chocolate stouts are so popular these days!  Both the frosting and the ganache have a stronger taste of the Bailey’s and Jameson, respectively.  Feel free to go a bit lighter on the alcohol.  As my mom said, you can get drunk off these babies.

Just as a warning though, the alcoholic ingredients are not the cheapest.  The smallest bottle of Bailey’s I could find was $26.99 and the small bottle of Jameson cost me $18.99.  To keep costs down, I’d suggest using another brand of whiskey.

The cupcakes have been a hit so far with my family, and I didn’t hate the way the house smelled after all the baking was done either!  

How do you plan to celebrate St. Patrick's Day this year?

Saturday, March 14, 2015

Road to France Pt. 2 - Easy Booking with Go-today.com


France, here we come!

After months of talking about it, Mom and I finally booked our trip to France. I’ve known that I was going, but having it booked makes the whole thing feel that much realer. Now I can start making my (in)famous itineraries (more on that later) and start booking excursions. My Fodor’s travel guides will no longer tease me from their perch on my bookshelf. 133 days until take off!

I’ve gone on several European vacations (London in 2012, Italy in 2014), and I’ve always booked them using Go-today.com.  I love the fact that you get the feel of a travel agent without the booking fee.  Whenever I have a question, I can just send a quick email to the person who helped me to book my trip or give them a call.  I’ve always gotten a reply within a few hours.

What I also like abut Go-today.com is that they do give you the option to select from their vacation packages or to create your own.  For both London and Italy, I used the pro-offered packages.  I selected the package based on my destination, picked the departure date, and chose the flights and hotels from a list compiled for me. This time around I decided to design my own trip though, and it was just as easy, to my surprise.  All I had to do was enter my departure city and destinations with desired dates, and Go-today.com did the rest.  It provided me with flight, rail, and hotel options as well as offering transportation to and from the airports, travelers insurance, and some sightseeing options.  All I have to do was make my selection and pay—easy peasy.  All my travel documents will be sent to my Go-today account as PDFs when they’re ready for easy access.

My experiences with Go-today.com have always been great.  I like the fact that I book everything in one go—flights, hotels, transfers, etc.—and that I don’t have to fret over misplacing documents. 

Mom and I will be in France for 10 days, and we’ll spend the first 6 in and around Paris before taking a train to Nice for the rest of our stay.  The whole trip cost between $2700-2800 per person, and that’s including round-trip airfare, hotel stays (with continental breakfasts), airport transfers, and rail tickets.  The one downside to Go-today.com is that you have to pay for the whole trip upfront, which can put a serious dent in your bank account, but it’s worth it!  Regardless, I highly recommend Go-today.com if you’re going to be making travel plans soon.  With over 40 countries to choose from, there are plenty of options for avid travelers!

Thursday, March 12, 2015

Love Your Skin with Olay Complete


It is a truth universally acknowledged that winter wreaks havoc on the skin. Or at least it should be a truth universally acknowledged. The cold weather leaves skin dry, chapped, and in a general state of disrepair. But since winter in the Northeast requires layers upon layers of clothing, it’s pretty easy to hide the problem. Spring is just around the corner though (hopefully), so soon there will be a lot more skin visible. That means it’s time to get my skin back into respectable shape.

I’m pretty lax when it comes to moisturizing my skin (I’m working on it, I swear!), but the one place I never skimp on is my face, especially in the winter. Olay is the only face lotion I've ever used thanks to both of my parents indoctrinating it in me. I have vivid memories of my father slathering “Oil of Olay” on my fat baby cheeks. Both my mom and dad use it to this day, although we all use different formulas.

I swear by Olay Complete with SPF 15. I’m pretty fair-skinned, so I always need a little bit of UV protection to prevent me from turning into a boiled lobster. I like the fact that the SPF is in my moisturizer so that I don’t have to worry about an extra step in the mornings when I’m getting ready for work.

The cream is light and smooth, so you hardly notice that it’s on. It’s also not oily like some lotions can be, which is important for someone with sensitive skin like me. The tiniest bit of oil on my skin and I break out; I’ve never had that problem with Olay Complete.  The fact that it also has vitamins E, B3, and C in it means that I know my skin is being nourished around the clock.  

At $5.99 a pot, I think Olay is a huge steal.  It’s part of my daily routine, and I put it under all my make-up. My skin feels supple and fresh, and knowing that it's well-hydrated and protected from the sun all year round is a huge plus.